 ** Updated post located here**
I deployed some VM’s using both JSON and PowerShell and enabled Storage Service Encryption to encrypt data at rest. Now I want to enable Azure Disk Encryption (ADE) on these VM’s as an extra level of security. In this post I will go over enabling Azure Disk Encryption with BitLocker on Windows Server. More information on Azure Disk Encryption, including encrypting Linux can be found here.
There is a lot of information from Microsoft on configuring Disk Encryption. Most of it covered different methods, such as PowerShell or CLI and different OS versions. This post is sticking to the basics, encrypting existing Windows OS using the portal to get things started and PowerShell to do the encryption. Check out this link if you want more information on Azure Encryption options.
But First, A Couple Notes
A couple notes to get things started. There is an option to encrypt VM’s with a Key Encryption Key (KEK). Use this or you will not be able to back up and recover VM’s with Azure Recovery Vault*. Also, there are two types of key vaults, Standard and Premium. Premium uses Hardware Security Modules (HSM) protected keys and costs under a couple dollars a month. There is no reason not to go with HSM in production.
*At the time of this writing there is some conflicting information regarding if KEK is necessary to backup with Azure Recovery Vault. This document indicates that the KEK is required, but in this recently updated Microsoft document, it indicates that BEK only VM’s are supported. In my tests you can backup a BEK encrypted VM if you add the Backup Secret permissions to the Backup Management Service in the Key Vault Access Policy. For the sake of this post, I’m sticking with the KEK requirement as outlined in the first document.
When Azure Disk Encryption is enabled on a Windows OS, ADE mounts a Bek volume on the E:\ drive. This drive is used to manage keys while the VM is running. The Bek volume will take over the E:\ drive. I suggest moving any volumes that are mounded on E:\ to another drive letter prior to encrypting. Further testing shows this is not the case. The Bek Volume will take the next available drive letter.
Lastly, update your Azure Module in Powershell. This is important, don’t skip this step.
Update-module AzureRM
If you don’t have the Azure Module installed, run the “get-module azurerm” and “import-module azurerm” to get it.
Alright, let’s get this started now that that’s out of the way.
Azure AD Enterprise Application
Azure requires the ability to access, generate and update keys in the key vault. It does this by using an Azure AD Enterprise Application. In this step we will setup the application and grant it access.
From the Azure Portal, go to Azure Active Directory, Enterprise Applications and select All Applications.
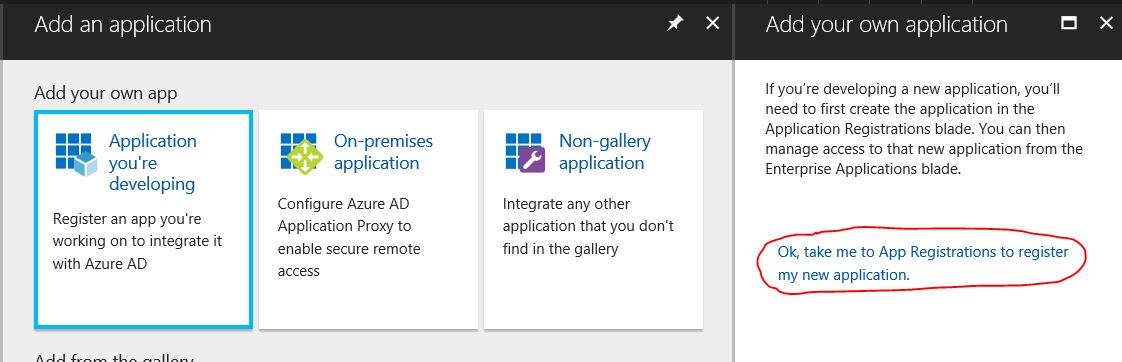
Add a new Application. This is not from the gallery, select the option for “Application you’re developing” and select the option to “register my new application”
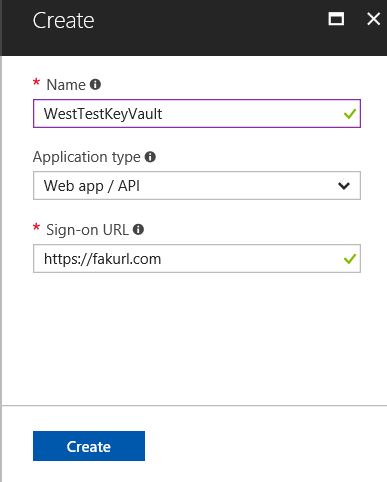
Next, select the option for New application registration. Give the application a name, set the type to Web app/API and set any sign-on URL you want, it won’t be used for this application.
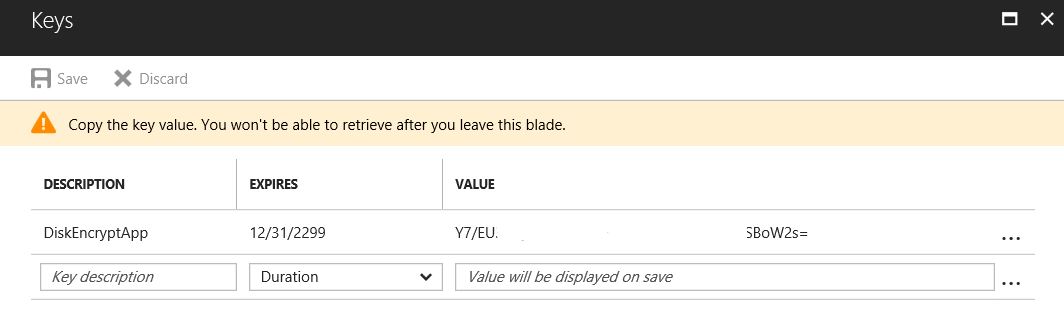
Once that’s deployed, go into the application and select Keys to add a key. Add a description and set the Expiration value. When you click Save a value will appear. Record the value!! You will not be able to retrieve this key later. Also, be sure to update the key before expiration if you set the key to expire.
The Key Vault
Now create the Key Vault. This can be found in the Azure Portal. Use an existing or setup new. Note that the Key Vault needs to be in the same region as the VM you are encrypting. Create multiple key vaults if you have VM’s in more than one region.
Fill out all the usual boxes and check marks in Create Key Vault . Leave the access policy as is, we will update that later. Select the option to enable access to Azure for Disk Encryption under Advanced Access Policy. Click OK and Create to setup the vault.

Encryption Key
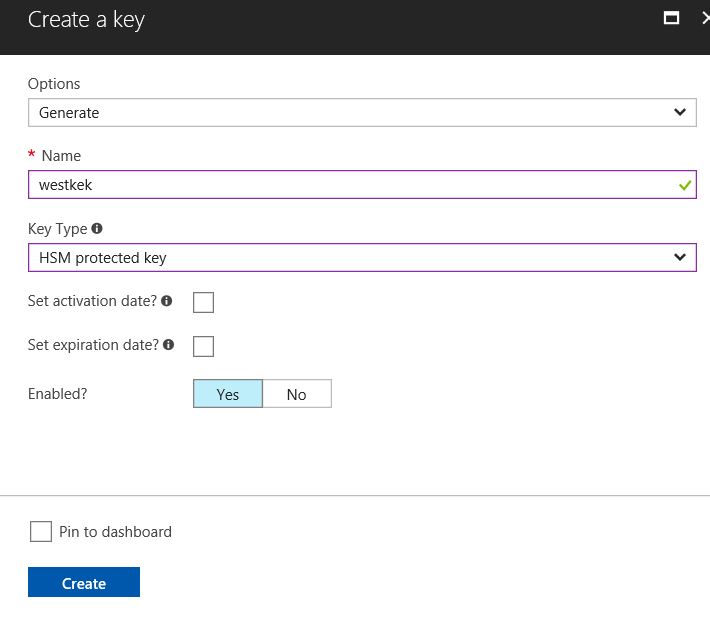
Next step is to setup the Encryption Key. Go into the freshly minted (or existing) vault and go to keys to add a key. Give it a name and set the type to HSM (if you don’t have that option it’s because you have a standard Key Vault). Make sure it’s enabled and click Create.
Add Permissions to the Application
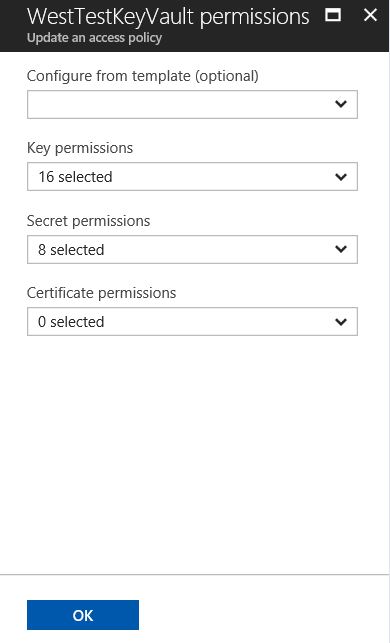
Next step is to add permission to the Key Vault for the Enterprise Application. Go into the Key Vault and open Access Policies, Add New. Select the Enterprise Application setup previously as the Service Principal. As the VM is encrypted, the application will generate, update and read keys to the key vault. Give the application all Key Permissions and Secret Permissions. Save the changes when finished
The Encryption Commands
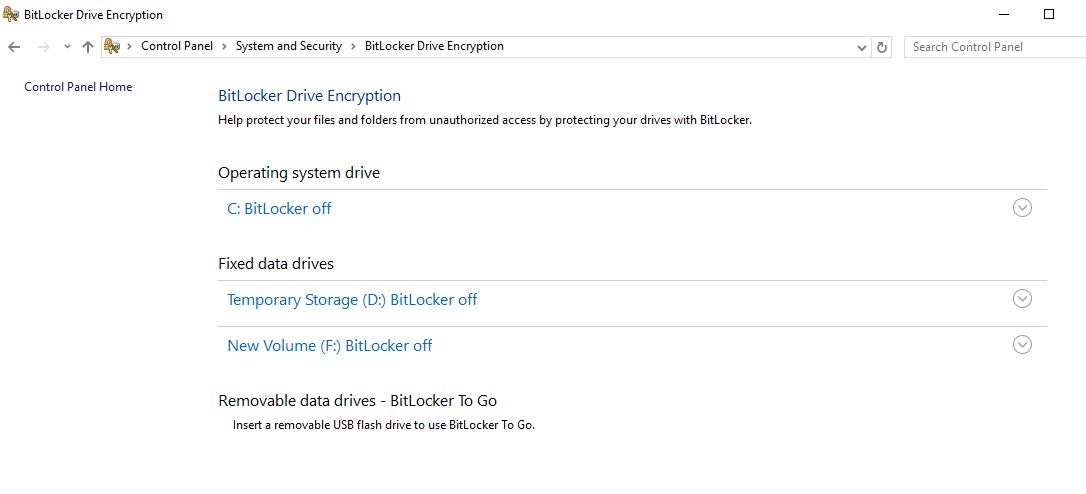
We are ready for disk encryption now that the prep work is finished. Notice the computer below has an OS, temp and F: data drive, all with BitLocker turned off. You can also run the following command to get the VM Encryption Status:
Get-AzureRmVMDiskEncryptionStatus -ResourceGroupName RGName -VMName VMName
Here is a breakdown of the commands:
First the variables. This section specifies the VM name and Resource Group as well as the ID of the application setup earlier. The application ID is a long GUID listed in Azure AD under Enterprise Applications Properties. The Application Secret was given when the application key was created.
$VmRgName = ‘Virtual Machine Resource Group'
$vmName = ‘Virtual Machine Name'
$aadApplicationID = ‘long string of digits for the application ID'
$aadApplicationSecret = ‘long string of digits for the application secret'
Listed below are the variables for the Key Vault. Although the Key Vault and encrypted VM have to be in the same region, they do not need to be in the same Resource Group. This example assumes that the Key Vault is in a different Resource Group. If that’s not the case, simply add the same Resource Group as above.
$kvRgName = ‘Key Vault Resource Group'
$kvKeyName = ‘Key Vault Key Name’
$keyVaultName = 'Key Vault Name'
$KeyVault = Get-AzureRmKeyVault -VaultName $KeyVaultName -ResourceGroupName $kvRgName
The rest of the variables required for the command to run.
$diskEncryptionKvUrl = $KeyVault.VaultUri
$KeyVaultResourceId = $KeyVault.ResourceId
$keyEncryptionKeyUrl = (Get-AzureKeyVaultKey -VaultName $keyVaultName -Name $kvKeyName).Key.kid;
*Now seems like a good time to remind you to test in a test environment and backup VM’s prior to encrypting. Proceed at your own risk!
After the above commands are entered and ran it’s time to encrypt the dive. The command below will start the process.
A note about the -Skipvmbackup switch. This will do as it says, skip the backup prior to encrypting and is not recommended for non-managed disks. However, the backup process that set-AzureRmVMDiskEncryptionExtenstion runs is not supported for managed disks and the command will fail unless you add the -skipvmbackup switch. Per Microsoft, it is a requirement that you manually backup the disks prior to running this command on a VM with managed disks.
Set-AzureRmVMDiskEncryptionExtension -ResourceGroupName $vmRgname `
 -VMName $vmName `
 -AadClientID $aadApplicationID `
 -AadClientSecret $aadApplicationSecret `
 -DiskEncryptionKeyVaultUrl $diskEncryptionKvUrl `
 -DiskEncryptionKeyVaultId $KeyVaultResourceId `
 -KeyEncryptionKeyUrl $keyEncryptionKeyUrl `
 -KeyEncryptionKeyVaultId $keyVaultResourceId `
 # Remove the -skipvmbackup for non-managed
 # disks (as well as the ` mark at the end of the line above)
 -skipvmbackup
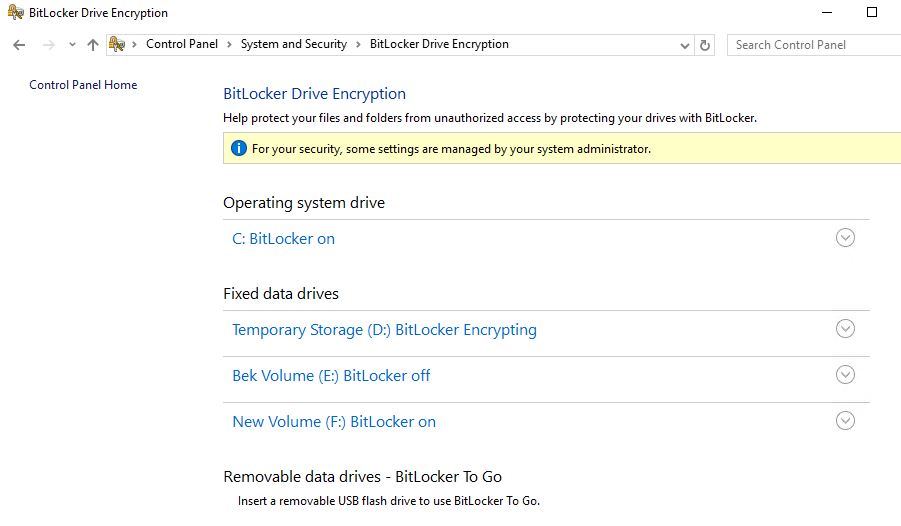
The process will force a reboot. All the drives are now showing as encrypted after the restart.
And that’s it, you now have encrypted disks. Always test this is the lab before production. Azure is nuanced and changes rapidly. Posts can become dated quickly.
One last piece of advice, test backup and recovery prior to putting Azure Disk Encryption into production. Disk encryption adds a layer of complexity to the recovery process. Be sure to understand how to recover encrypted VM’s before you need to recover one!

